|
Last week we created a project with HTML and everything about it was just about links which redirects you to another page. My awesome list was about games on the internet that I personally enjoy and love. HTML is not hard at all, it just takes practice and knowledge to know what you are actually capable of putting up the screen. You can find everything you need to know about learning HTML on the internet. Trust me, all the resources that you will need to know is out there somewhere; all you have to do is find it. Here is my Awesome List Project on Repl. 
0 Comments
 A few weeks ago we started a new project in Scratch called binary hero. It's basically like guitar hero, but the only difference is that it's with binary code. The project was fun but it wasn't the real thing. Real coding is different than scratch, it takes a lot of brainpower and logic to code and you have to master those things. You can also view other projects created by other people all over the world. HERE's MINE!  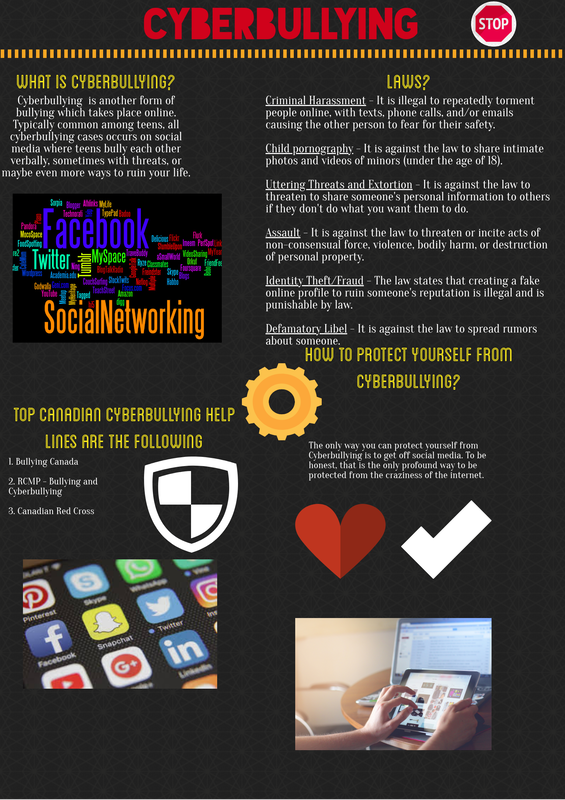 Last week we started a new project and we had to create an infographic using the topic of our choice. My topic for this project was Cyberbullying, and I created an infographic which answered 4 questions. "What is cyberbullying? What are the laws for cyberbullying? How do you protect yourself from cyberbullying? and What are the top Canadian cyberbullying help lines that are available?". I had fun making this project although I had a ton of projects to work on, this was the project that I had fun with the most. The application we used in creating our infographics was called PiktoChart, an easy-to-use infographic maker. All I can say is that creating things that help you understand the computer world is always fun and is the future of tomorrow.
 The evolution of websites go way back to 1989 where the first programming language for making websites has been created. HTML, stands for Hypertext Markup Language and is best paired with Javascript, CSS, PHP, Bootstrap, etc. These programming languages are all the tools you need to make websites, aside from needing an internet connection, a code editor and other resources. Websites have taken a huge step since 1989 and from the web. Websites have been bringing up their game for the last 17 years and are still progressing until today. Without websites we could have never accomplished what we have now. Websites play a big role in our world and since then technology has changed and has changed our lives for the better. "Evolution Of Websites Timeline," is the timeline I created on Google Docs which shows you how it all started from 1989 to the present day, I hope you enjoy learning and discovering the evolution of websites as much as I have and take pride on what humans have accomplished in the past 29 years! We created our very own monsters and figures via Sculptris and it was fun. I mean it was kinda hard at first but the more you play with the program the easier it gets to sculpting the figure. When I finished my figure, we uploaded it to MIxamo, which is a program that makes your figure come alive and move and do different gestures. After giving our figures some actions and gestures, I uploaded my figure to Giphy and created a GIF out of it. Click Here to see my GIF. Anyways, Sculptris was a fun program an I encourage people to use it to make the figures in their heads come to life.   Man... what else can I say about 3D printing? All I know is that it is awesome and its something everybody can try and be good at it, especially making Lego figures . To be completely honest I love this project, and as much as I enjoy making Lego figures I feel like I can do more than just make Legos. I wanna make something interesting, complicated and useful to the world and when I do just imagine the possibilities. So here are the steps on how I made my Lego figure: 1. You start making one leg of the figure and once you've finished the first leg you can just duplicate the first leg to make a second one and adjust your measurements from there. 2. After the legs, you make the midsection, and the midsection must be perfectly aligned with the legs. 3. Then you make the torso, both sides must be slanted because that is how the lego torso is originally supposed to look. Align the torso to the figure's midsection. After the torso you make a neck and put it above the torso because this is where your head goes. 4. You make the head and it should be easy because it really is. after making the head, connect it to the figure's neck which is located on top of the torso. 5. Arms, the arms must have connectors that connect it to the figure's torso which would go on the sides of the torso. 6. Design, this is your lego so design it however you want and be creative :) LINKS: What is 3D Printing? Tinkercad Introduction? 3D Printing samples...
My Podcast is about the 2018 NBA Playoffs and the 2018 NBA Finals. This is the time in each NBA Season that every Basketball fan is excited about and this is what we've all been waiting for in a long time. As a Basketball player and a fan, I am very much interested in anything that is in regard to Basketball and whatsoever. Basketball is my life, and everything to me is always Basketball. Well if you're a Basketball fan, then I encourage you to listen to this Podcast because I provide additional information regarding the Playoffs and the Finals. Making my Podcast took a lot of hard work and patience and a lot of editing to be honest. I stuttered a lot but it turned out okay if you just breathe and relax and talk calmly. My Podcast, this link takes you to Sound cloud where you can listen to my podcast, enjoy :) But first let me explain what a podcast is, A podcast is a digital audio file made available on the Internet for downloading to a computer or mobile device, typically available as a series, new installments of which can be received by subscribers automatically. Click here for more information about Podcasts! 
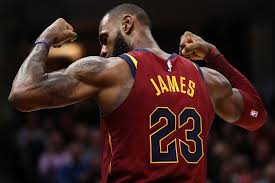
 My video is about Lebron James' top dunks in his career. I picked this topic because I am a huge basketball fan and watching one of the best players in the world is such an honor. Seeing Lebron dunk in real life is so much better than being recorded because you get to experience greatness above all else. Here are the steps on how to make your own Movie: 1. Find video clips of your topic on the internet. 2. Convert those videos to mp4s because Windows Live Movie Maker only accepts mp4 files. 3. Rearrange your clips and add images if necessary, and don't forget to add a title too. 4. When finished save your movie and convert it to and mp4 because as you save your movie it becomes a wmv file and to upload it to youtube it has to be an mp4. 5. Upload your movie to Youtube. Hyperlinks: (Lebron James), this link takes you to a website which shows his stats. (Championships), this link takes you to a website which shows you how many championships he won. (Conferences), this link takes you to a website which will show you his latest conferences.
|
|||||||||